SSH Keys With PuTTY and Cygwin for Windows

In my work at Digitas, I need to login to a number of client-specific Linux machines via a terminal emulator (there is no UI for these remote environments) from my local Windows laptop. For this my team uses Cygwin, a Linux-like environment for Windows making it possible to port software running on POSIX systems (such as Linux, BSD, and Unix systems) to Windows. It’s possible to login of course just using a standard username/password combination with Mosh or SSH at the command line. However, the more secure (and easier to manage) approach is to utilize SSH keys to login into a virtual private server.
In this post, I’ll delve into how I’ve set up my computer to use public/private SSH key pairings for accessing different environments. I previously posted about using SSH keys with Git Bash and TortoiseGit for Windows. While it’s possible to use the same SSH key pairings that were used for that, I prefer the more secure approach of generating specific pairings for Github  , Gitlab
  , and any client-specific instances.
Step 1
Download the following PuTTY files from this site: http://www.chiark.greenend.org.uk/~sgtatham/putty/download.html.
- PuTTY (the SSH and Telnet client itself)
- Pageant (an SSH authentication agent for PuTTY, PSCP, PSFTP, and Plink)
- PuTTYgen (an RSA and DSA key generation utility)
Step 2
Using the downloaded PuTTYgen executable, generate a new key. Click the ‘Save public key’ and ‘Save private key’ buttons to save these to the same location as your other keys (if you have any). On Windows, the .ssh folder of your home directory will be something like this: C:\Users\\*username*\\.ssh. You can create this directory if it doesn’t exist. When saving the private key you will be optionally asked to enter a password for another layer of security if desired - it is also possible to hit ‘OK’ and not use a password in combination with the SSH private key. Keep PuTTYgen open for now as you will need to copy the public key value into the authorized_keys files on the appropriate private server.

Make sure you save the public key with a .txt (or .pub) extension and the private key with a .ppk one:


Step 3
Open up Cygwin and log into the machine that you wish to configure with SSH keys. You’ll need the standard username/password credentials for the instance for now. In your home directory, issue the following commands:
$ mkdir -p .ssh
$ chmod 700 .ssh
$ nano .ssh/authorized_keys
Copy the generated public key in PuttyGen and paste it in the Nano editor:
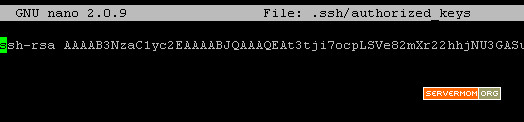
http://www.servermom.org/wp-content/uploads/2014/06/public-key-save.jpg
Save and exit Nano by hitting ctrl+O, enter, then ctrl+X on your keyboard. Then change its permission to 644 with this command:
$ chmod 644 .ssh/authorized_keys
Step 4
Ensure that PuTTY’s Pageant (downloaded in Step 1) is running (you should see a little icon for it in the tray at the bottom of your screen):

Double-click this to see the current list of private keys loaded to Pageant. You can manually load them each time through this UI when your computer boots up, but the more efficient approach is to have them load on startup following these steps. Pageant can load one or more private keys when it starts up if you provide them on the Pageant command line. The simplest way to do this in Windows is to create a specially crafted shortcut inside the Startup folder (Start -> Programs -> Startup).
Step 5
The last step is to download this daemon that allows you to use your loaded SSH keys from PuTTY’s Pageant in Cygwin. By editing your ~/.bashrc (or ~/.bash_profile - check where Cygwin is installed on your computer for these files) to add the following, this program will run whenever you start Cygwin.
# ssh-pageant
eval $(/usr/bin/ssh-pageant -r -a "/tmp/.ssh-pageant-$USERNAME")
With Cygwin running now with the loaded private keys from Pageant, you will be able to make secure, automated SSH connections from this shell to remote environments or other services built on top of SSH, like SFTP file transfers or pushing to git repositories.
About Me
I'm a data leader working to advance data-driven cultures by wrangling disparate data sources and empowering end users to uncover key insights that tell a bigger story. LEARN MORE >>
comments powered by Disqus